If you’ve ever updated your website and had absolutely no idea whether it helped or hurt, this post is for you.
Google Analytics 4 (GA4) is a free tool that tells you exactly what’s happening on your website… who’s visiting, how they found you, what they’re doing once they get there, and where they’re dropping off. For a small business owner trying to make smart decisions about their marketing without wasting time or money, it’s one of the most valuable things you can set up.
The good news is that it’s free. The slightly less good news is that it can feel overwhelming the first time you open it. This guide will walk you through getting set up, what to actually look at once you’re in, and what to do with what you find.
What Is GA4 and Why Does It Matter?
GA4 is the current version of Google Analytics. If you had Google Analytics set up before July 2023, you were likely using the older version called Universal Analytics, which Google has since sunset. GA4 is what everyone is using now, and if you haven’t set it up yet, you’re missing out on data that could be helping you make better decisions about your website and marketing.
GA4 tracks what Google calls “events”, which are actions people take on your site like page views, clicks, form submissions, and scrolls. It gives you a much more complete picture of how people actually interact with your site compared to the old version.
How to Set Up GA4
Step 1: Create a Google Analytics Account
Go to analytics.google.com and sign in with your Google account. If you’ve never used Google Analytics before, you’ll be prompted to create a new account.
Give your account a name… your business name works perfectly here. Then click Next.
Step 2: Set Up Your Property
A “property” in GA4 is essentially your website. Give it a name, select your time zone and currency, and click Next.
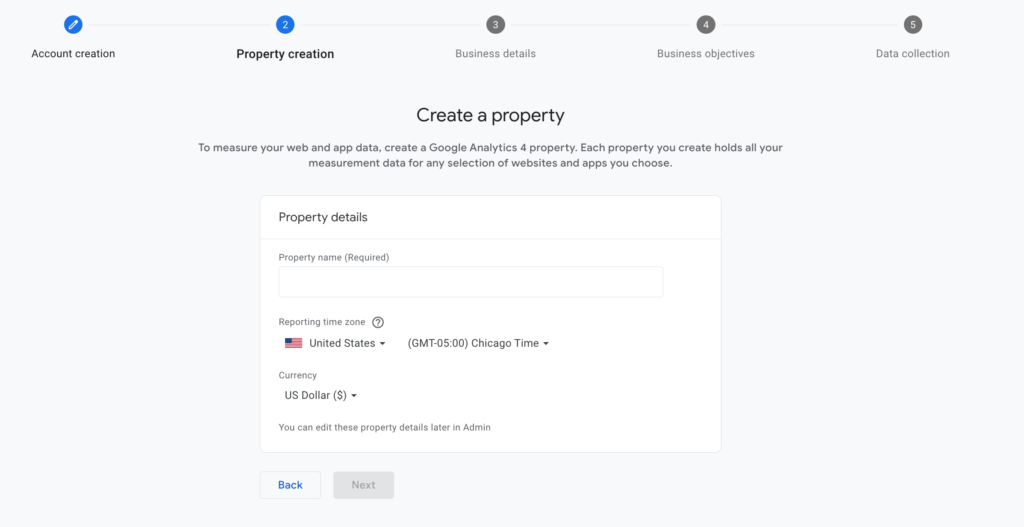
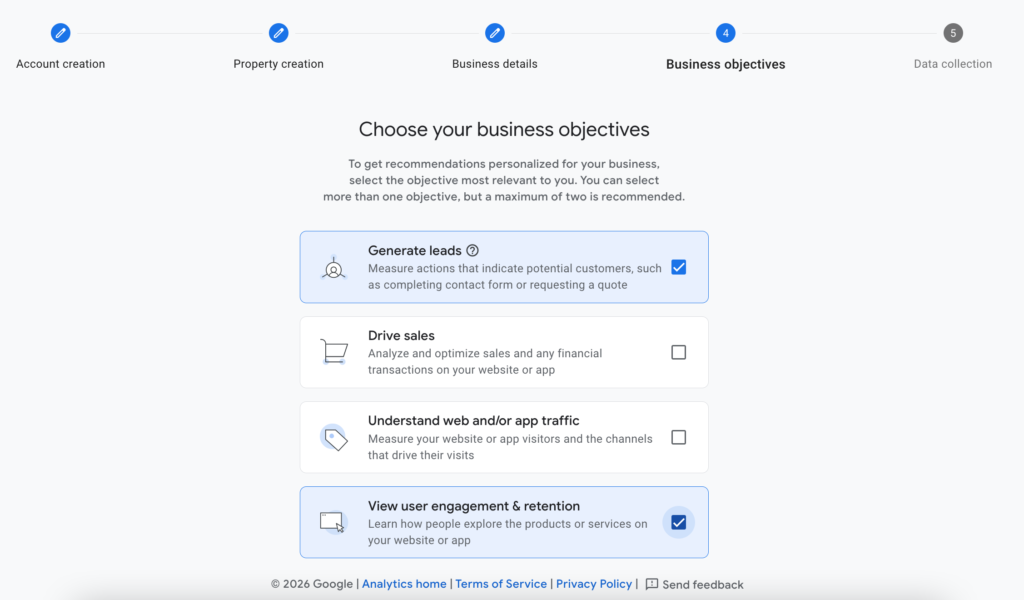
You’ll then be asked a few questions about your business: industry category, business size, and how you intend to use GA4. Answer these honestly as GA4 will use them to suggest relevant reports for your dashboard.
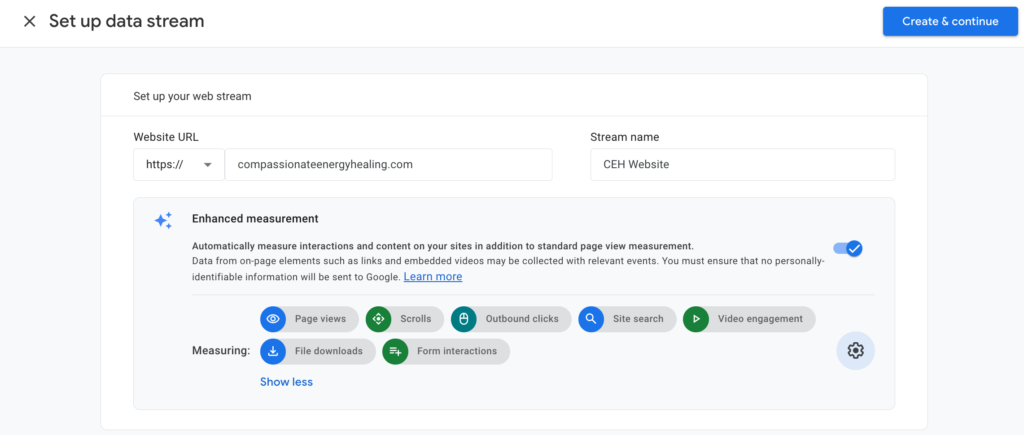
Step 3: Set Up a Data Stream
This is where you tell GA4 which website to collect data from. Select “Web” as your platform.

Enter your website URL and give your stream a name. Then click Create Stream.
Step 4: Install Your Tracking Code
GA4 will generate a Measurement ID that looks something like G-XXXXXXXXXX. This needs to be added to your website so GA4 can start collecting data.
How you install it depends on your website platform:
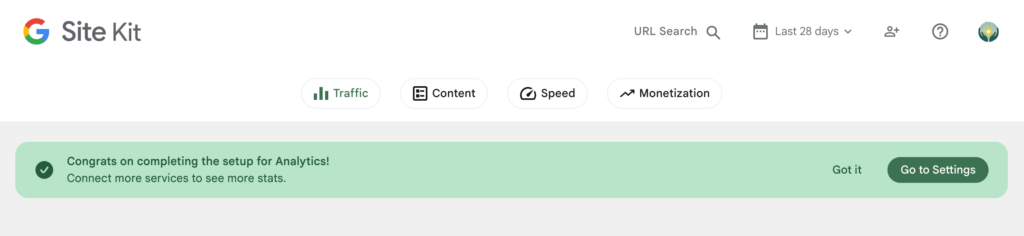
If you’re using WordPress: The easiest method is to use a plugin like Site Kit by Google, which connects GA4 to your WordPress site without needing to touch any code. Install the plugin, follow the prompts to connect your Google account, and it will handle the rest.
If you’re using Squarespace, Wix, or Shopify: Each of these platforms has a built-in field for your GA4 Measurement ID. Go to your platform’s analytics or integrations settings, paste your Measurement ID, and save.
If you have a developer: Send them your Measurement ID and ask them to add the GA4 global site tag to the <head> of every page on your site.
Step 5: Verify It’s Working
Once your tracking code is installed, go back to GA4 and navigate to Reports, then Realtime. Open your website in a separate browser tab and you should see yourself show up as an active user within a minute or two.
If you see yourself there, you’re collecting data. If not, double-check that your Measurement ID was entered correctly in your platform settings. Keep in mind that it may take up to 48 hours for data to start collecting, so check back in a few days.
Step 6: Exclude Your Own Traffic
This step is easy to skip and important not to. If you visit your own website regularly, which most business owners do, your visits will skew your data. The cleanest way to filter yourself out in GA4 is to use a browser extension like “Block Yourself from Analytics” which prevents your visits from being tracked.
Alternatively, if you have a static IP address at your office or home, you can set up an internal traffic filter in GA4 under Admin, then Data Streams, then your stream name, then Configure Tag Settings, then Define Internal Traffic.

What to Look at Once You’re Set Up
GA4 collects a lot of data. Here are the reports that matter most for a small business just getting started.
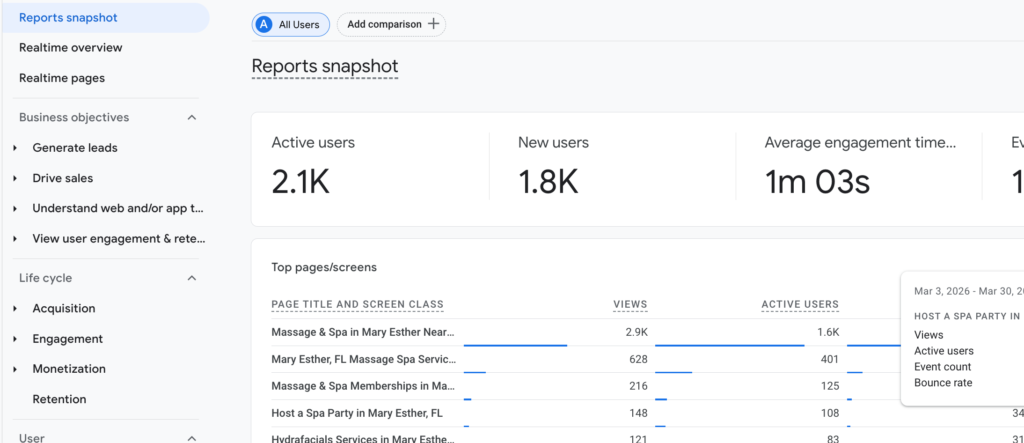
Reports Snapshot
Your home base. This gives you a snapshot of users, sessions, and engagement at a glance. Check this regularly to get a feel for your baseline traffic and spot any unusual spikes or drops.
Acquisition: Where Your Visitors Are Coming From
Navigate to Reports, then Acquisition, then Traffic Acquisition. This shows you how people are finding your site: through organic search, social media, direct traffic (typing your URL directly), or referral links from other sites.
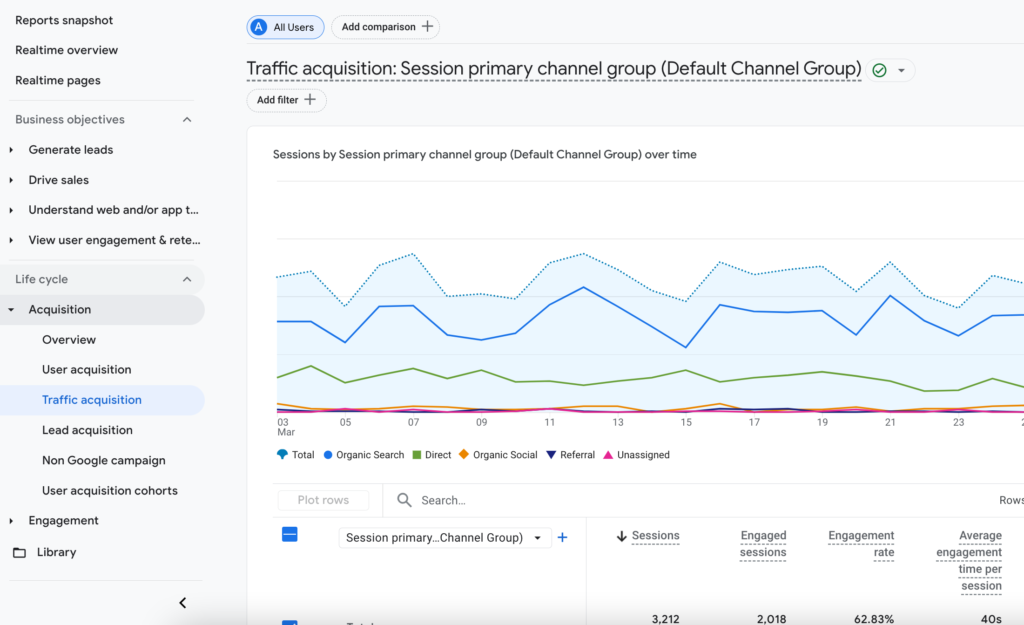
This is one of the most actionable reports for a small business. If most of your traffic is direct, it means people already know you but you may not be reaching new audiences. If organic search is low, it’s a signal that your SEO has room to grow. If social is driving traffic, you’ll know which platforms are actually worth your time.
Engagement: What People Are Doing on Your Site
Navigate to Reports, then Engagement, then Pages and Screens. This shows which pages are getting the most views and how long people are spending on each one.
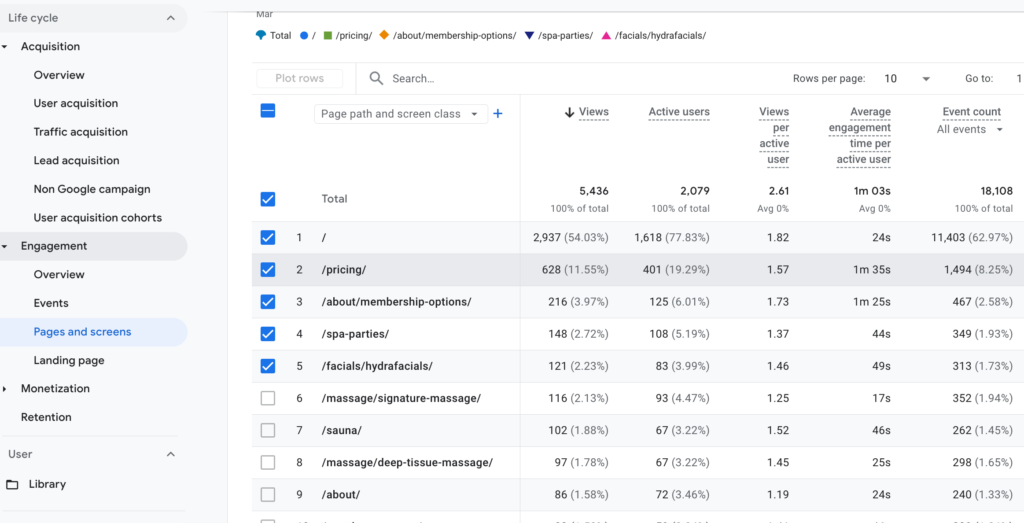
Pay attention to your most visited pages… are they the ones you want people to see most? Also look at average engagement time per page. If a page has a lot of views but very low engagement time, people are landing on it and leaving quickly, which is a signal that the content might not be matching what they expected to find.
Users: Who Is Visiting Your Site
Navigate to Reports, then User, then User Attributes, then Overview. This gives you demographic information about your visitors including location, age range, gender, and what devices they’re using.
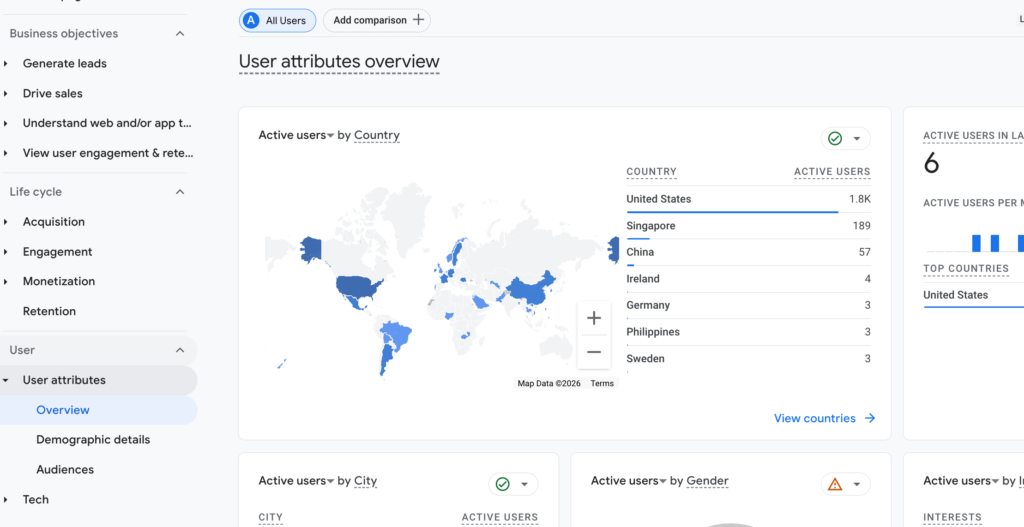
Compare this to your target customer profile. If the demographics don’t match up, it could mean your messaging or SEO strategy needs adjustment to attract the right audience.
What to Do With What You Find
Data is only useful if it leads to action. Here’s how to think about what you’re seeing:
If your traffic is low overall: Focus on SEO and content. Publishing consistent, well-optimized blog content is one of the most reliable ways to grow organic traffic over time. Check out my post on why your business needs a blog for more on this.
If your bounce rate is high on specific pages: That page isn’t delivering what visitors expected. Look at the page with fresh eyes. Does the content match the headline? Is there a clear next step for the visitor to take? Is it loading quickly?
If your best traffic source is organic search: Double down on SEO. Find out which pages are ranking and create more content in that vein.
If most of your traffic is direct: You have brand awareness but may not be reaching new audiences. Consider a content strategy or social media plan to expand your reach.
If your mobile traffic is high but engagement is low: Your site may not be optimized for mobile. Test it on your phone and look for anything that’s hard to read, slow to load, or difficult to navigate.
Set a recurring date to check your analytics. Monthly is a good starting cadence for most small businesses. Pick a date, put it on your calendar, and look at the same reports each time so you can start to see trends develop over time.
A Note on Patience
GA4 gets more useful the longer it runs. In the first few weeks, you won’t have enough data to draw meaningful conclusions. Give it 60 to 90 days before you start making big decisions based on what you see. What you’re building right now is a baseline, and that baseline becomes incredibly valuable over time.
Setting up GA4 today means that six months from now, you’ll have real data to work with instead of guessing. That’s the whole point!
Good ideas are just the beginning.
Let's make something real out of them together.